


Hello everybody! I’m so happy to be visiting Orlando Moms Blog to share this toy box tutorial with you. It’s one of my favorite projects from my little girl’s nursery and continues to be a lot of fun, especially as she’s getting older.
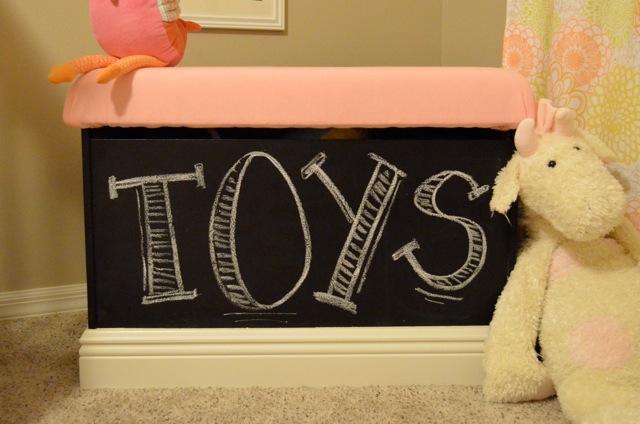 When I was pregnant I often lay in bed at night sketching ideas and dreaming up the perfect nursery. One night I had a vision of my little girl playing with her stuffed animals in front of a chalkboard background where she’d doodled a cute little scene. Adorable right? This was probably fueled by the zillions of chalkboard ideas I saw on Pinterest. I was dying to do a “chalkboard-something” in her room and finally realized that her toy box could be used both for storage and for artwork. After all, why should all the fun be inside the toy box?
I’d consider this an easy DIY project. Granted, I do have a talented handy-man and carpenter on my side (thanks Dad)! However, since I started with a basic toy box, the rest really wasn’t too difficult. If you’d like to create something similar, here’s how to make the cutest toy box in town!
What you need:
- Wood toy box frame. I bought mine used (Craigslist is a great place to look). I am pretty sure it was one of those basic kits from Target/Walmart/Ikea.
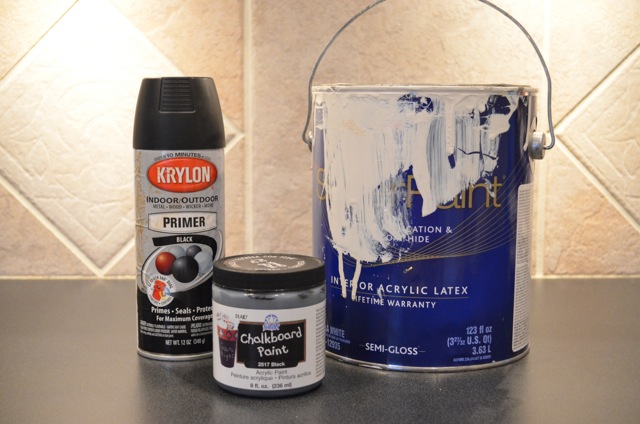
- Black and/or white primer
- Molding (The size is up to you. Mine was 4 1/2″, leftover from a remodeling project.)
- Tack nails
- Wood glue
- Chalkboard paint
- White semigloss paint
- Paint brushes
- Batting
- Foam (I used 3 inch, cut to match the size of the toy box lid.)
- Staple gun
- Fabric (Upholstery fabric or a strong cotton duck cloth is great.)
Step 1: Clean and Prime
Before you begin, clean the surface of the toy box very well and remove the lid. Keep all the hardware in safe spot! Prime the exterior of the box with black primer and let it dry thoroughly. If you choose to use spray paint for the chalkboard you can probably skip the primer. If your molding is unfinished you’ll need to prime that as well with white primer. I recommend buying molding that is already primed white so that you’ll only need to paint it.
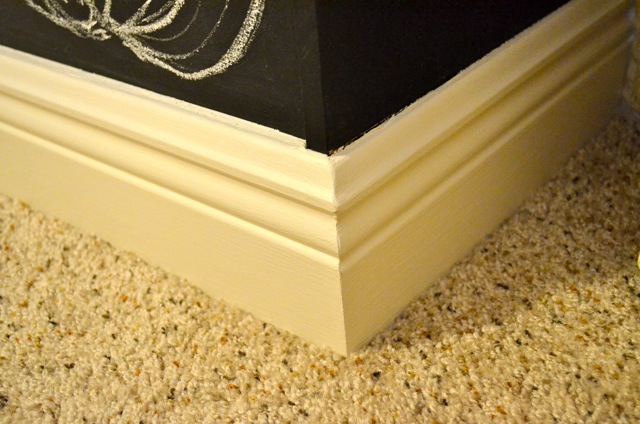
Step 2: Molding
Adding molding is optional, but looks really pretty. Cut the molding so that it will fit together nicely and form a tight frame around the base. Mine was done using baseboards and mitre saw, but 1x4s and simple corners would look great too! As long as you have exact measurements, many home improvement stores will make the cuts for you. When the primer is dry, attach the molding. I used a good amount of wood glue, secured each side with tack nails, and then put a clamp around it until everything was dry and secure. Let the glue dry thoroughly before moving on.
 Step 3: Painting
Tape off the molding using painters tape and paint the toy box front with the chalkboard paint. Let it dry, then add another coat or two if necessary. If I were to do this project again, I may try a spray paint form of chalk paint. Mine came out a little streaky even though I used a foam brush. When the chalkboard paint is dry, tape off the area above the molding and paint the molding white.
 Step 4: Upholstery
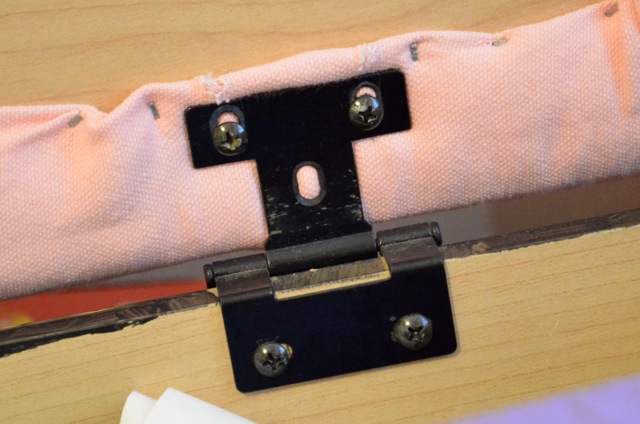
For the padded top, cut a piece of foam that is the same size as the lid. Using some hot glue or spray adhesive, attach the foam to the lid. Next, place the lid, foam side down, on top of the batting. As you go through these next few steps, pay attention to where the hardware goes. You may want to mark the spots where the screws go in so they won’t get lost in the fabric and batting.
Starting with each corner, wrap the batting up and over the foam and staple it to the underside of the lid. By now you can probably tell how much batting you’ll need, so go ahead and trim the excess to make this step easier. Working around the sides, continue to wrap and staple the batting. Be careful not to pull it too tightly or it will make the foam look dimpled. Once all the batting is attached, trim away the excess again.
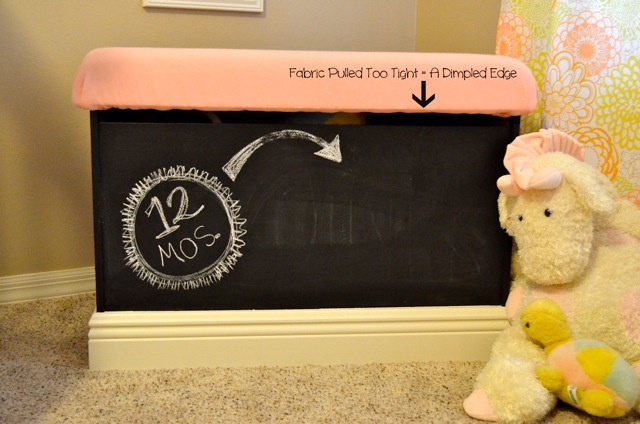
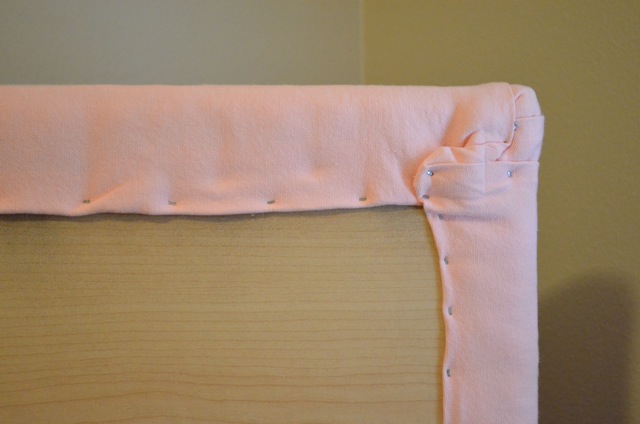 Repeat the same process with your fabric. Make sure you’ve ironed out all the wrinkles first! I like to fold the raw edge under as I staple so the fabric has a clean line. Also, bring your fabric in farther than the batting to hide the first set of staples. Again, don’t pull too tightly or the fabric will dimple. I made this mistake on the front edge as you can see below. If you’ve never upholstered something before, there are lots of helpful videos on YouTube where you can see the process I described.
 Step 5: Finish Up
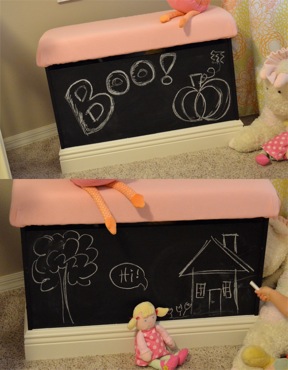
Poke holes through the fabric where your screws will go and put the toy box back together. Draw a fun picture with some chalk and you’re done!
 There is so much you can do to customize this project: use different colors of chalkboard paint, decorate the molding with polka dots or stripes, paint a child’s name on the front, even use a magnetic primer. Get creative with your toy box! The options are endless.
Happy crafting everybody!
~ Merrick


[…] her at [email protected] or visit her website at http://www.merrickdesigns.com. Also, look for a tutorial from Merrick on Orlando Moms […]