


When we moved to our new home we finally got stairs. Two stories of fun, for me and the kids.
Our house back in California was a one-story ranch. My childhood home in south Florida was also one story. All the houses back then were. I guess Floridians were scared that a hurricane would come along and blow off that second floor. Now almost all the new construction around Orlando are two-story houses, townhouses or condos.
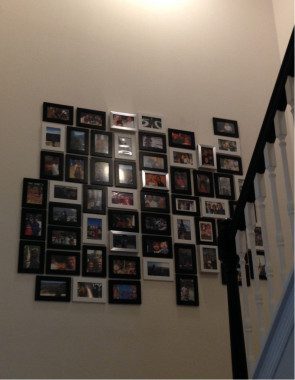
One of the challenges of making a house a home is decorating it. Now that we have this big stairway right in the middle the house, that meant finding something to fill the incredibly tall wall that is the focal point for everyone going up or coming down.
 My solution was to create a family photo wall. Instead of buying a big painting or one long tapestry to hang, I decided to make a wall of photos of how our family got here. I also didn’t want to buy those expensive pre-configured collage photo frames. They felt a little inflexible.
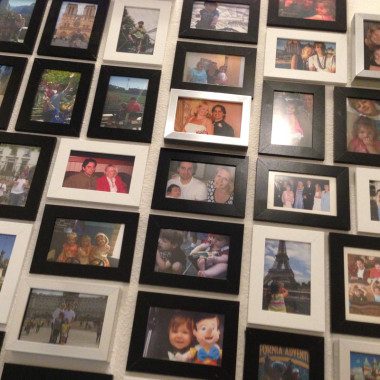
The first step was to print photos from the past 8 years. Everything from when my husband and I first met and got married to the birth of both kids and then all the fun travels, adventures and milestones we’ve had so far. I spent a couple hours skimming through my iPhoto library, saving any possible contenders for the family photo wall to a special folder of images I wanted to print. Once I had them sorted into that folder, I uploaded them all and put in an digital order to have them printed. (You can upload them to Target, Walgreens or CVS and go pick them up or you can use a service like Shutterfly or Apple and have them shipped straight to you.)
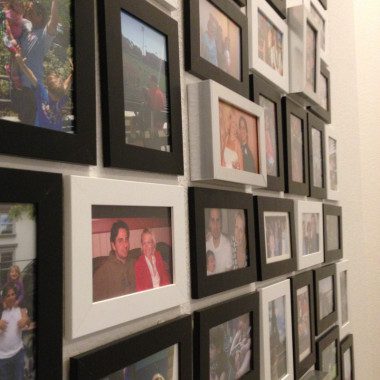
Once I had the physical pictures, the next challenge was buying frames. Since the goal of the wall is to feature as many photos as possible I had to find a way to build this without breaking the bank. This is where IKEA comes in handy. They sell inexpensive two-packs of NYTTJA 4×6 photo frames in various colors (black, white, dark blue, light blue, red, green, and pink) for only $2.99. (Click here to see the NYTTJA frames on the IKEA site.) Our house is pretty modern with a mainly black, white and grey color scheme so I picked just black and white frames and decided to do 2-3 black frames for every 1 white frame, just to mix it up and keep the wall from looking too white-on-white. I also wanted to mix up the look of the wall a bit more so I picked up a few RIBBA 4×6 frames in silver. These slightly different style frames give the wall some color and depth and for only $1.99 each they fit the budget too. (Click here to see the RIBBA style frames.)
With photos and frames in hand, I spent an afternoon picking pictures for each frame. I decided to take advantage of the different color frames and put more significant life events in the silver frames, other key moments or particularly good photos in the white frames, and then all the other fun shots in the black frames.
 |
 |
After the framed pictures were sorted and ready, then came the project of hanging them on the wall. I knew that my husband would want each picture measured and leveled and centered perfectly so I waited for a day when he was at work that I could hang them on my own. (While I admire his precision, it would have taken many weekends to get them done that way and I wanted to get my project up and on the wall already!) I did observe his “Mommy doesn’t use hammers” rule and bought a bunch of wall-safe removable mounting tabs to use for hanging the pictures.
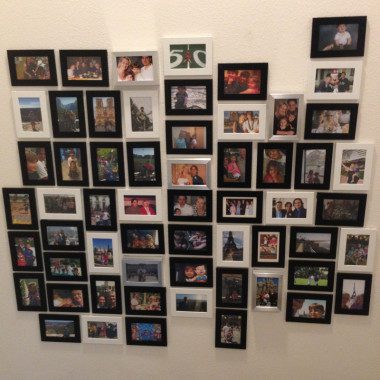
I started by hanging our wedding photo, in one of the offset silver frames, right in the middle of the wall. Then I started branching out, trying to put some of the earlier event pictures closer to the center and scatter the more recent ones out on the wall. I made some piles of what might go where before I actually mounted them which helped avoid a lot of hanging, unhanging, replacing and repositioning. I also wanted to keep the white ones separate from each other, making a point not to have two white frames “touching” one another on the wall. This makes the wall mainly black photos with the offset white and silver frames giving contrast and drawing the eye to those key events.
After I placed all the pictures on the wall, I was super impressed with how well it came out… if I do say so myself – and without a hammer or leveling device or anything! It’s really great now to see the pictures every time I go up and down the stairs, even if it is just to carry laundry or replacement toilet paper. Each time I pass by my eye catches a different image and it reminds me of that time. I assume it has the same effect on my husband and children. My hope is that as the kids age they will always remember and look to the wall to reflect and be proud of our family, our adventures, our achievements and our milestones.
Of course, the best part is that this stairway wall is still super tall and large. It has a lot more space for a lot more photos. As time passes I look forward to printing out new photos, picking up a few new frames from IKEA and growing our family photo wall. Not too expensive, very flexible and extremely personalized for our home!


